- Published on
Kubernetes cluster build with Raspberry Pi nodes and PoE Hats in a DIN breaker box panel
- Authors

- Name
- Peter Peerdeman
- @peterpeerdeman
One of the best ways to learn your way around Kubernetes is to build your own cluster and try the software out for yourself. I decided to go all the way, and follow some readily available tutorials to build my own four node cluster.
This post was originally dated 2020-05-31, which was when I ordered the materials. In the mean time, I've gone through several iterations of the cluster but it is now finally time to share a little about the project and my learnings. Let's start with the bill of materials:
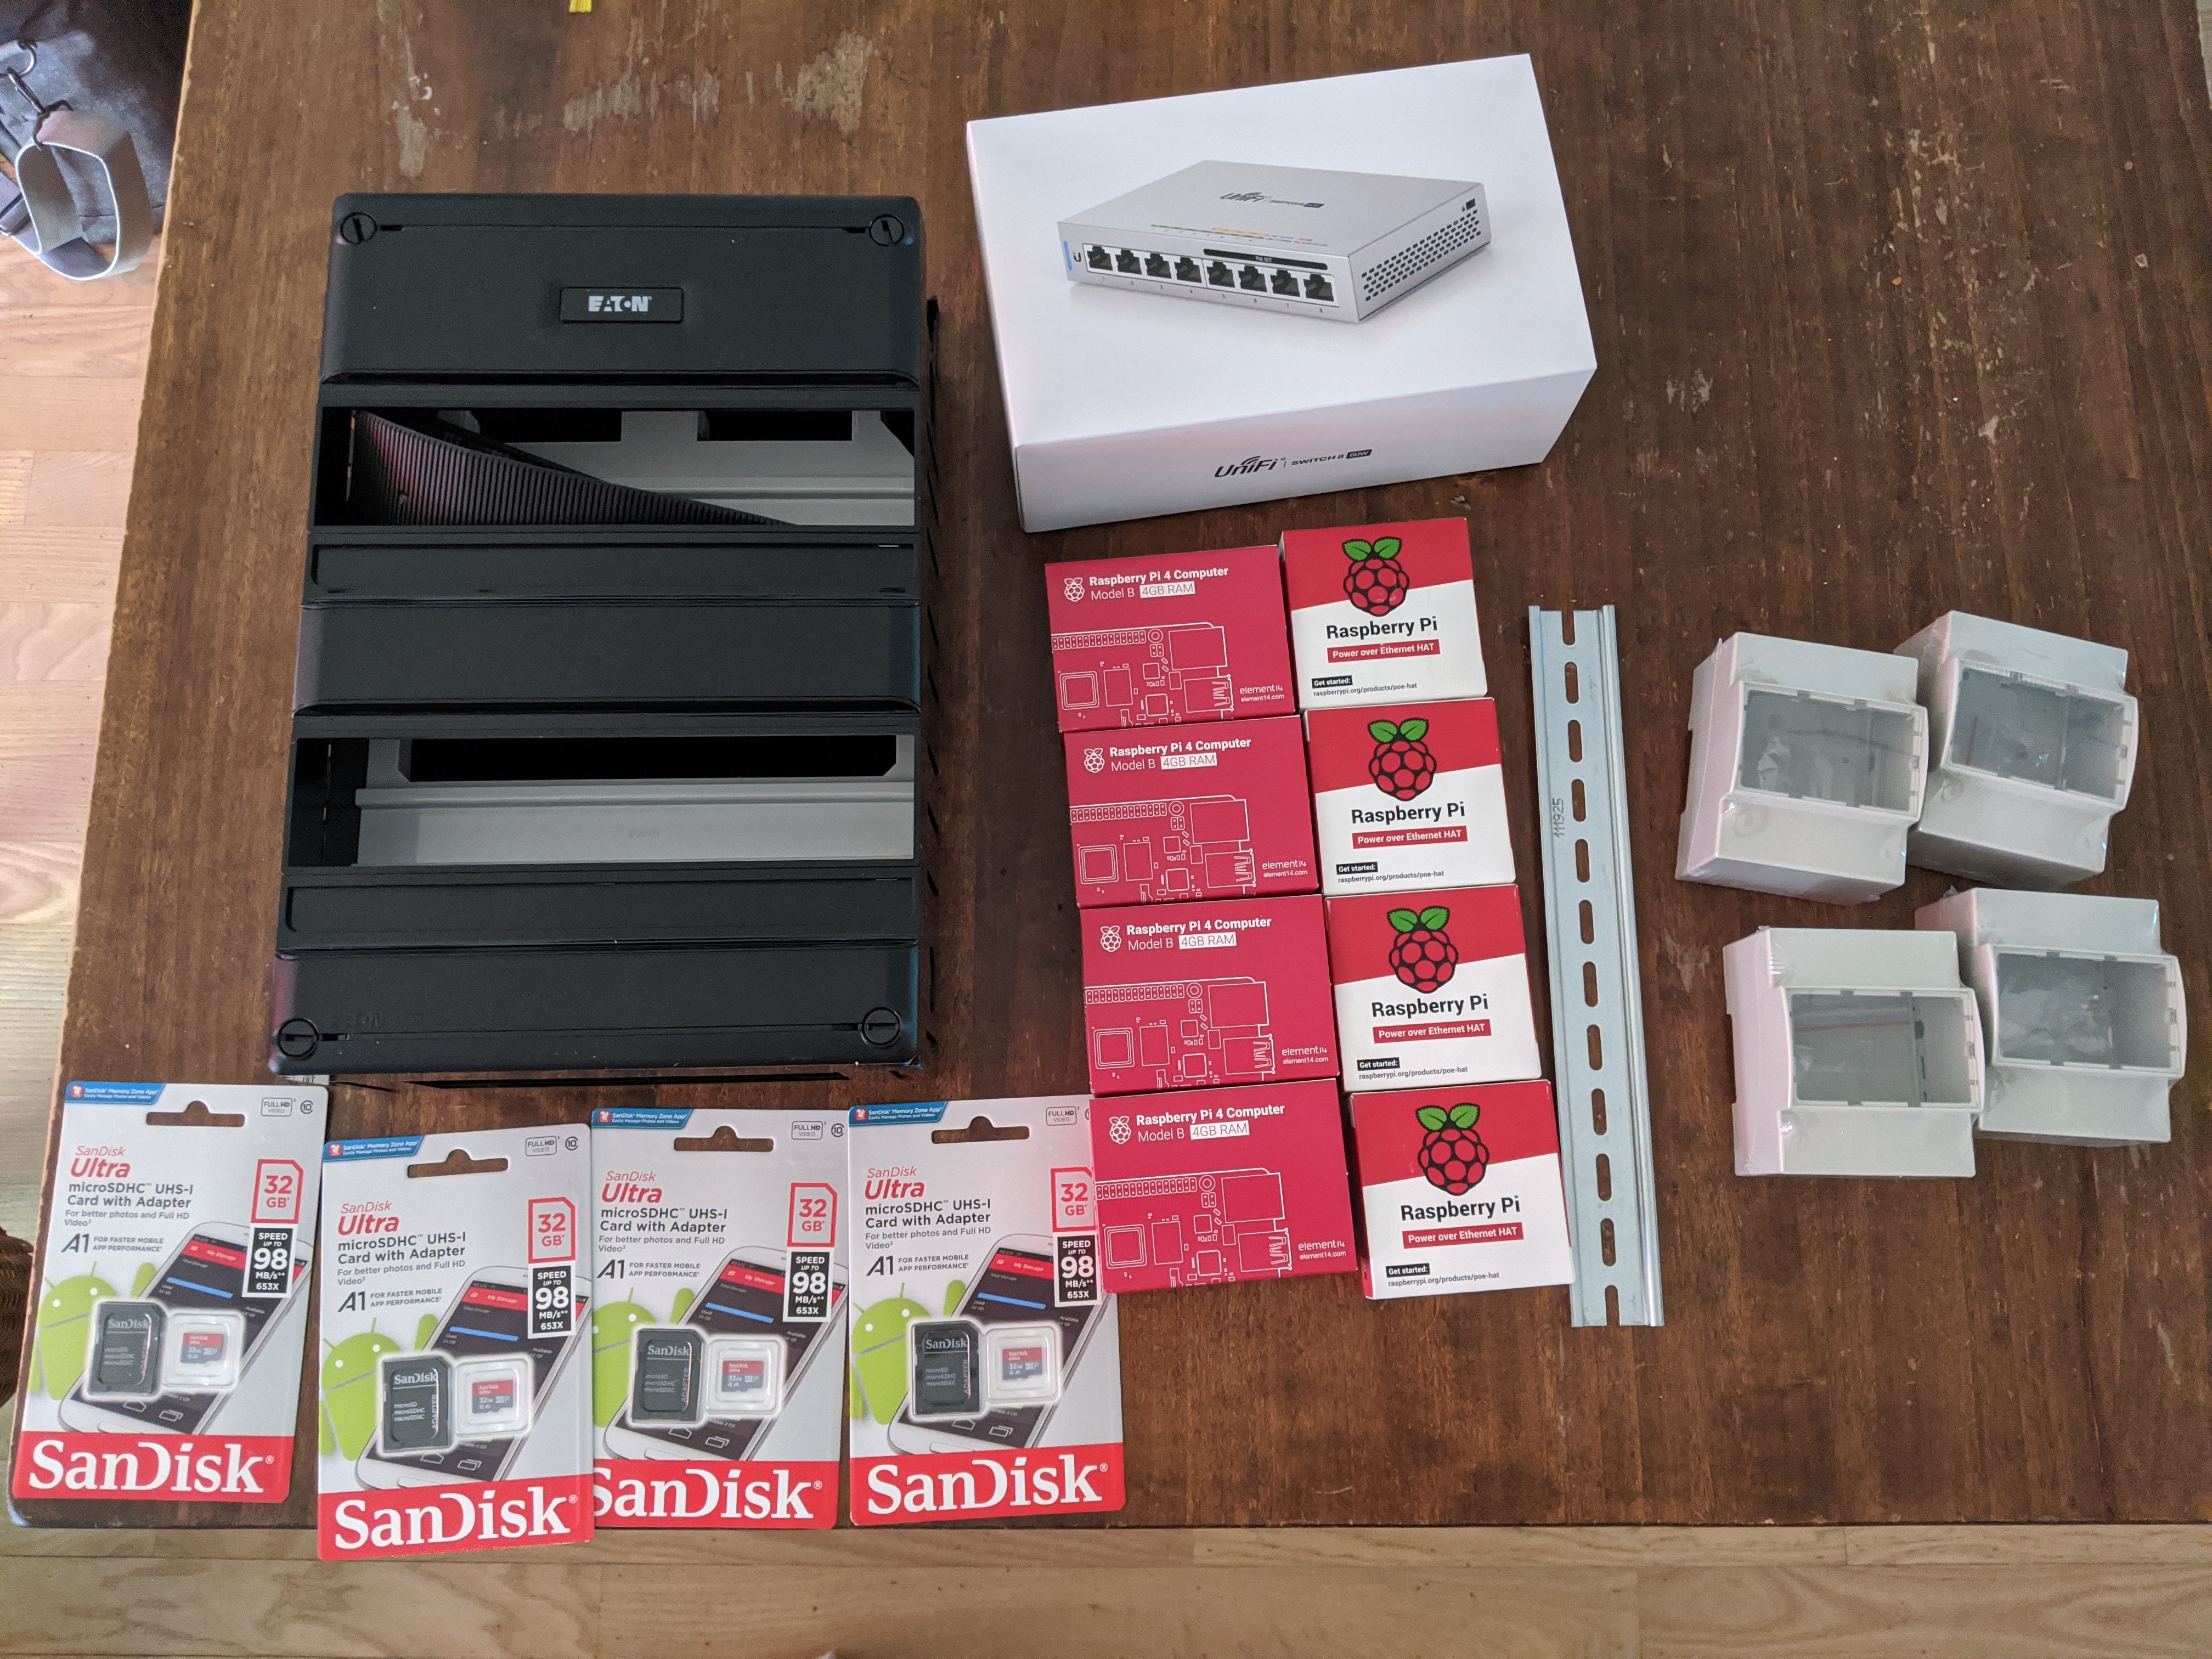
- Breaker Box: 1x Eaton Holec groepenkast S55 leeg 2-rijen 24 modules 220x330 mm
- Nodes: 4x Raspberry Pi® RP-4B-4GB 1 stuk(s)
- Power: 4x Raspberry Pi PoE HAT
- Disks: 4x SanDisk SDSQUAR-32GB-GN6MA
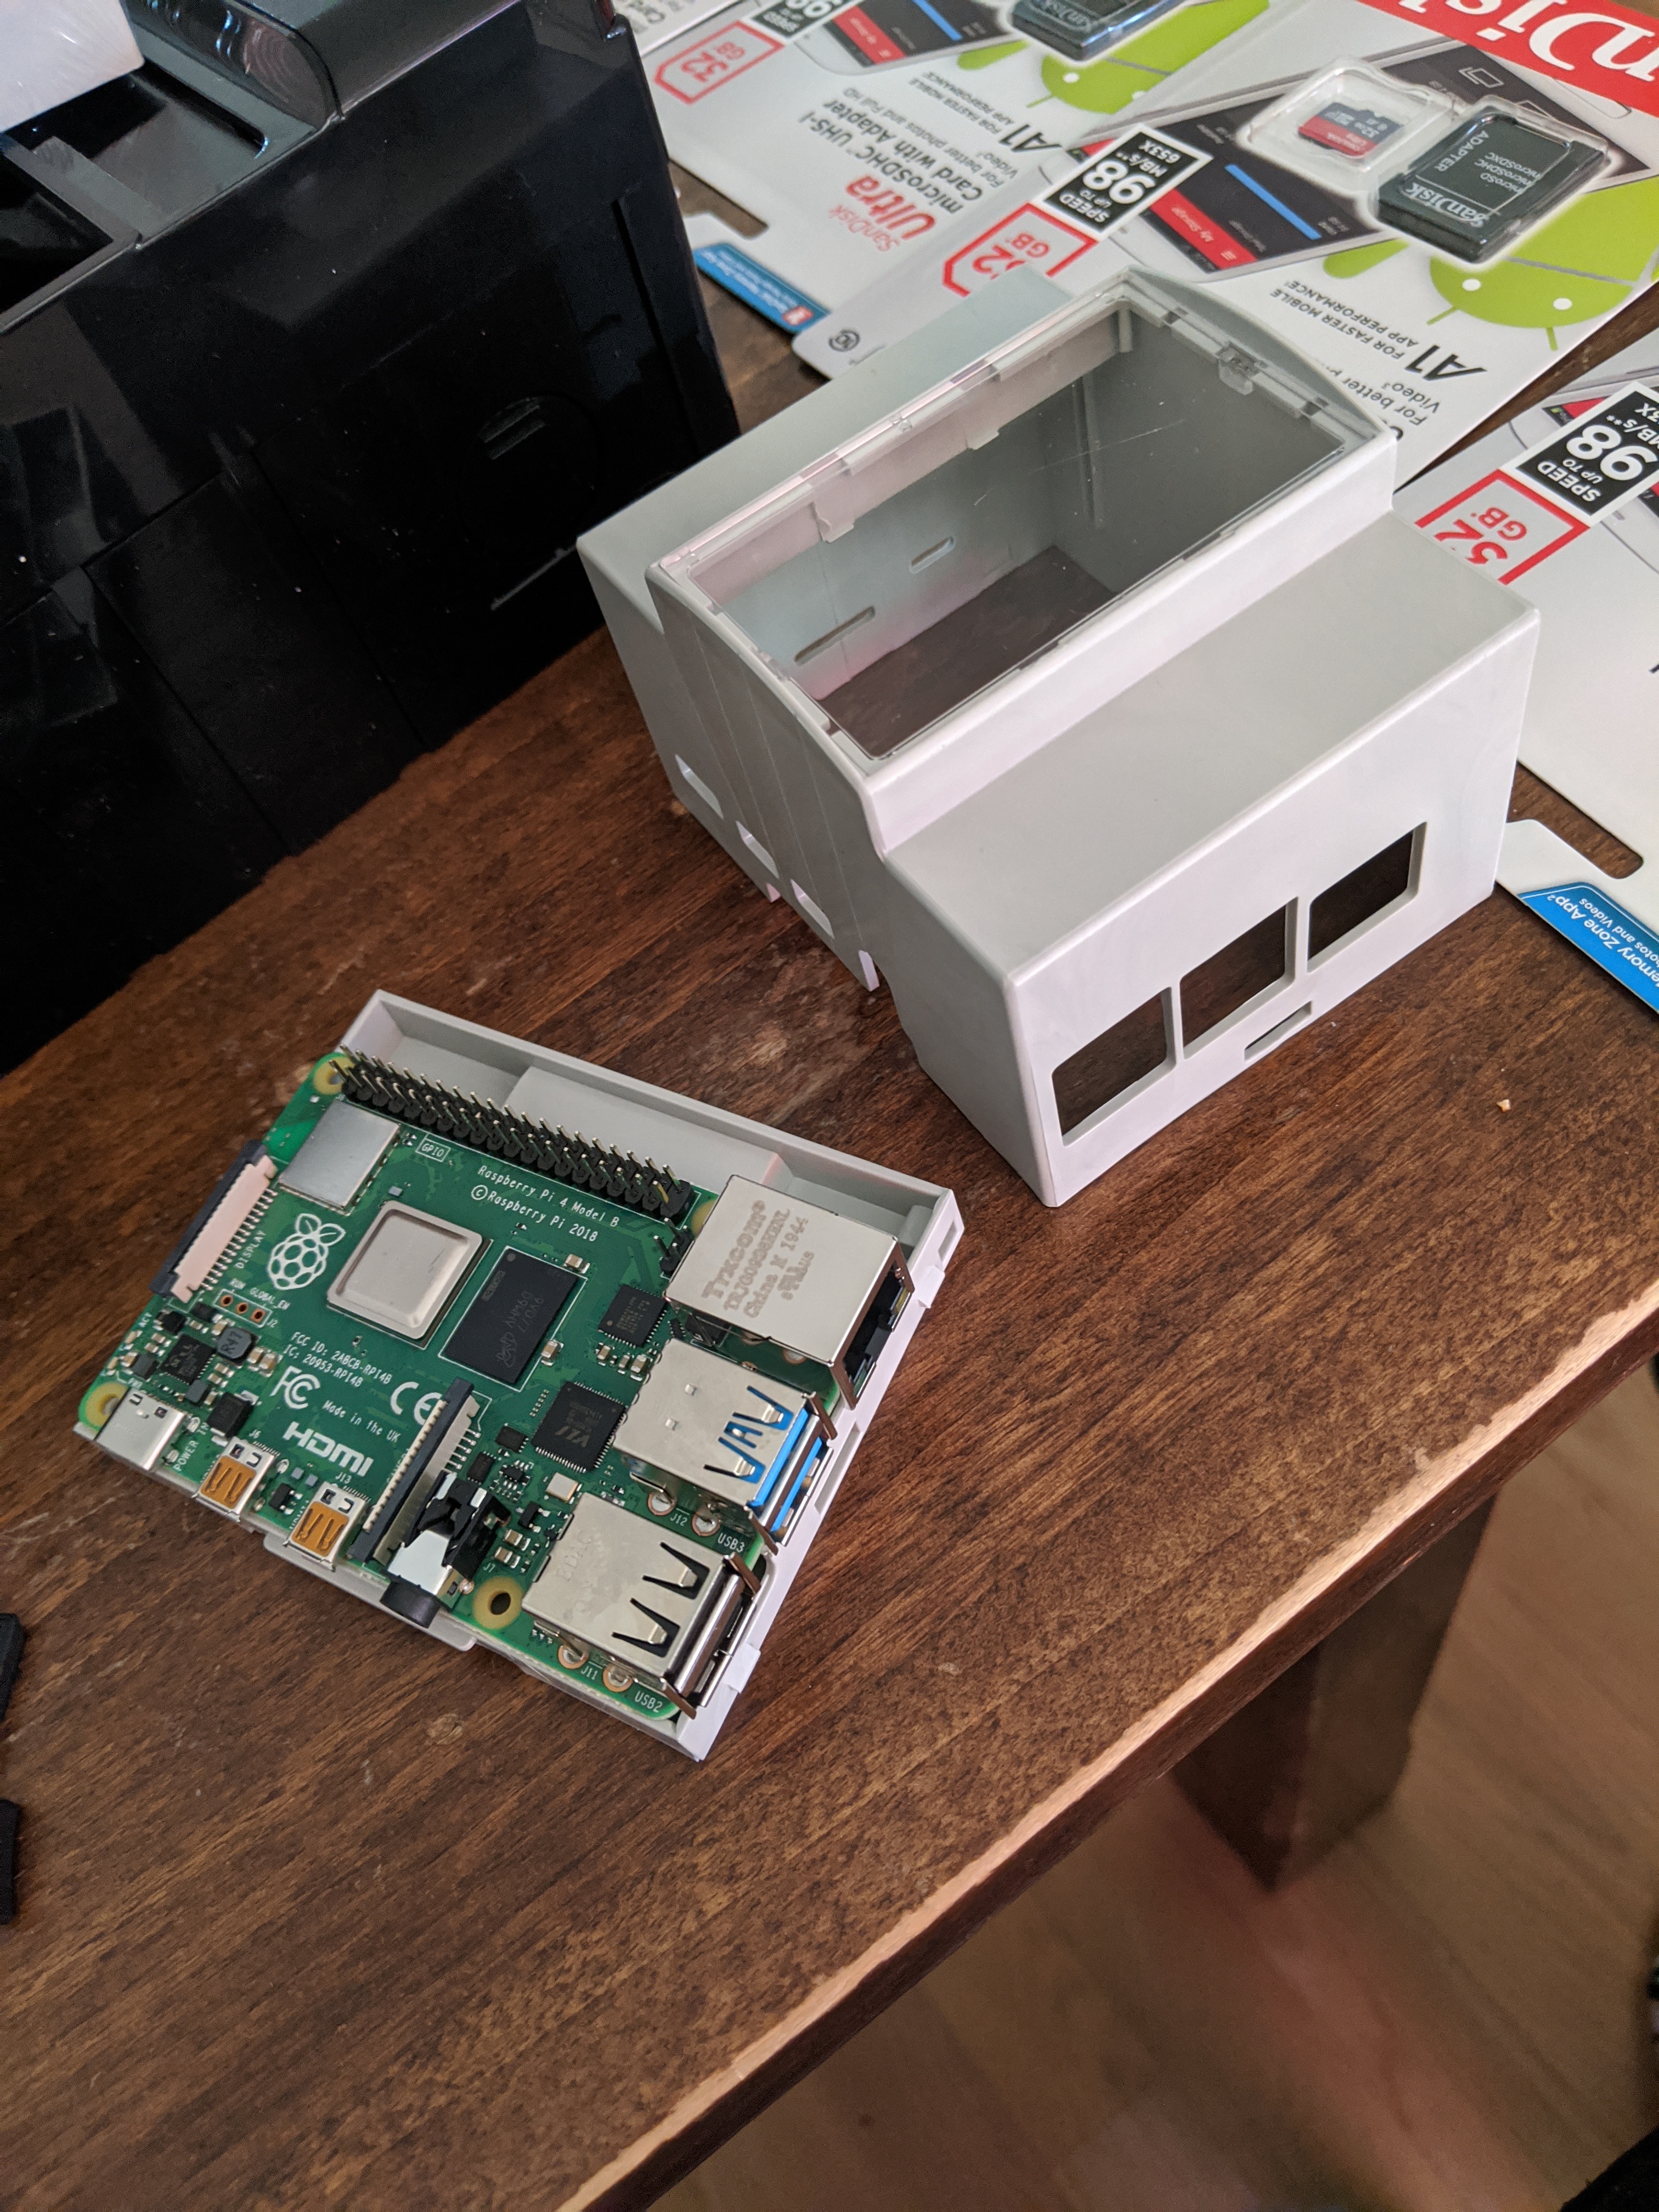
- Cases: 4x Joy-it RB-CaseP4+07 DIN rail case
- PoE Switch: 1x Unifi US-8-60W
The hardware part of the build was a lot of fun to set up. Instead of having the pies lie around separately I've opted to go for a DIN breaker box panel, similar to the one routing the power in our homes breaker box. The Raspberry pi's with PoE hats fit snugly into the cases, which can then be clicked onto the DIN rail inside the Eaton Holec Panel.
The original thought was to include the PoE switch in the panel as well, but that turned out to be a little too hot for comfort. Running the pi's off PoE avoids having to use the side connectors completely, allowing me to tightly pack 3 modules on a single din rail
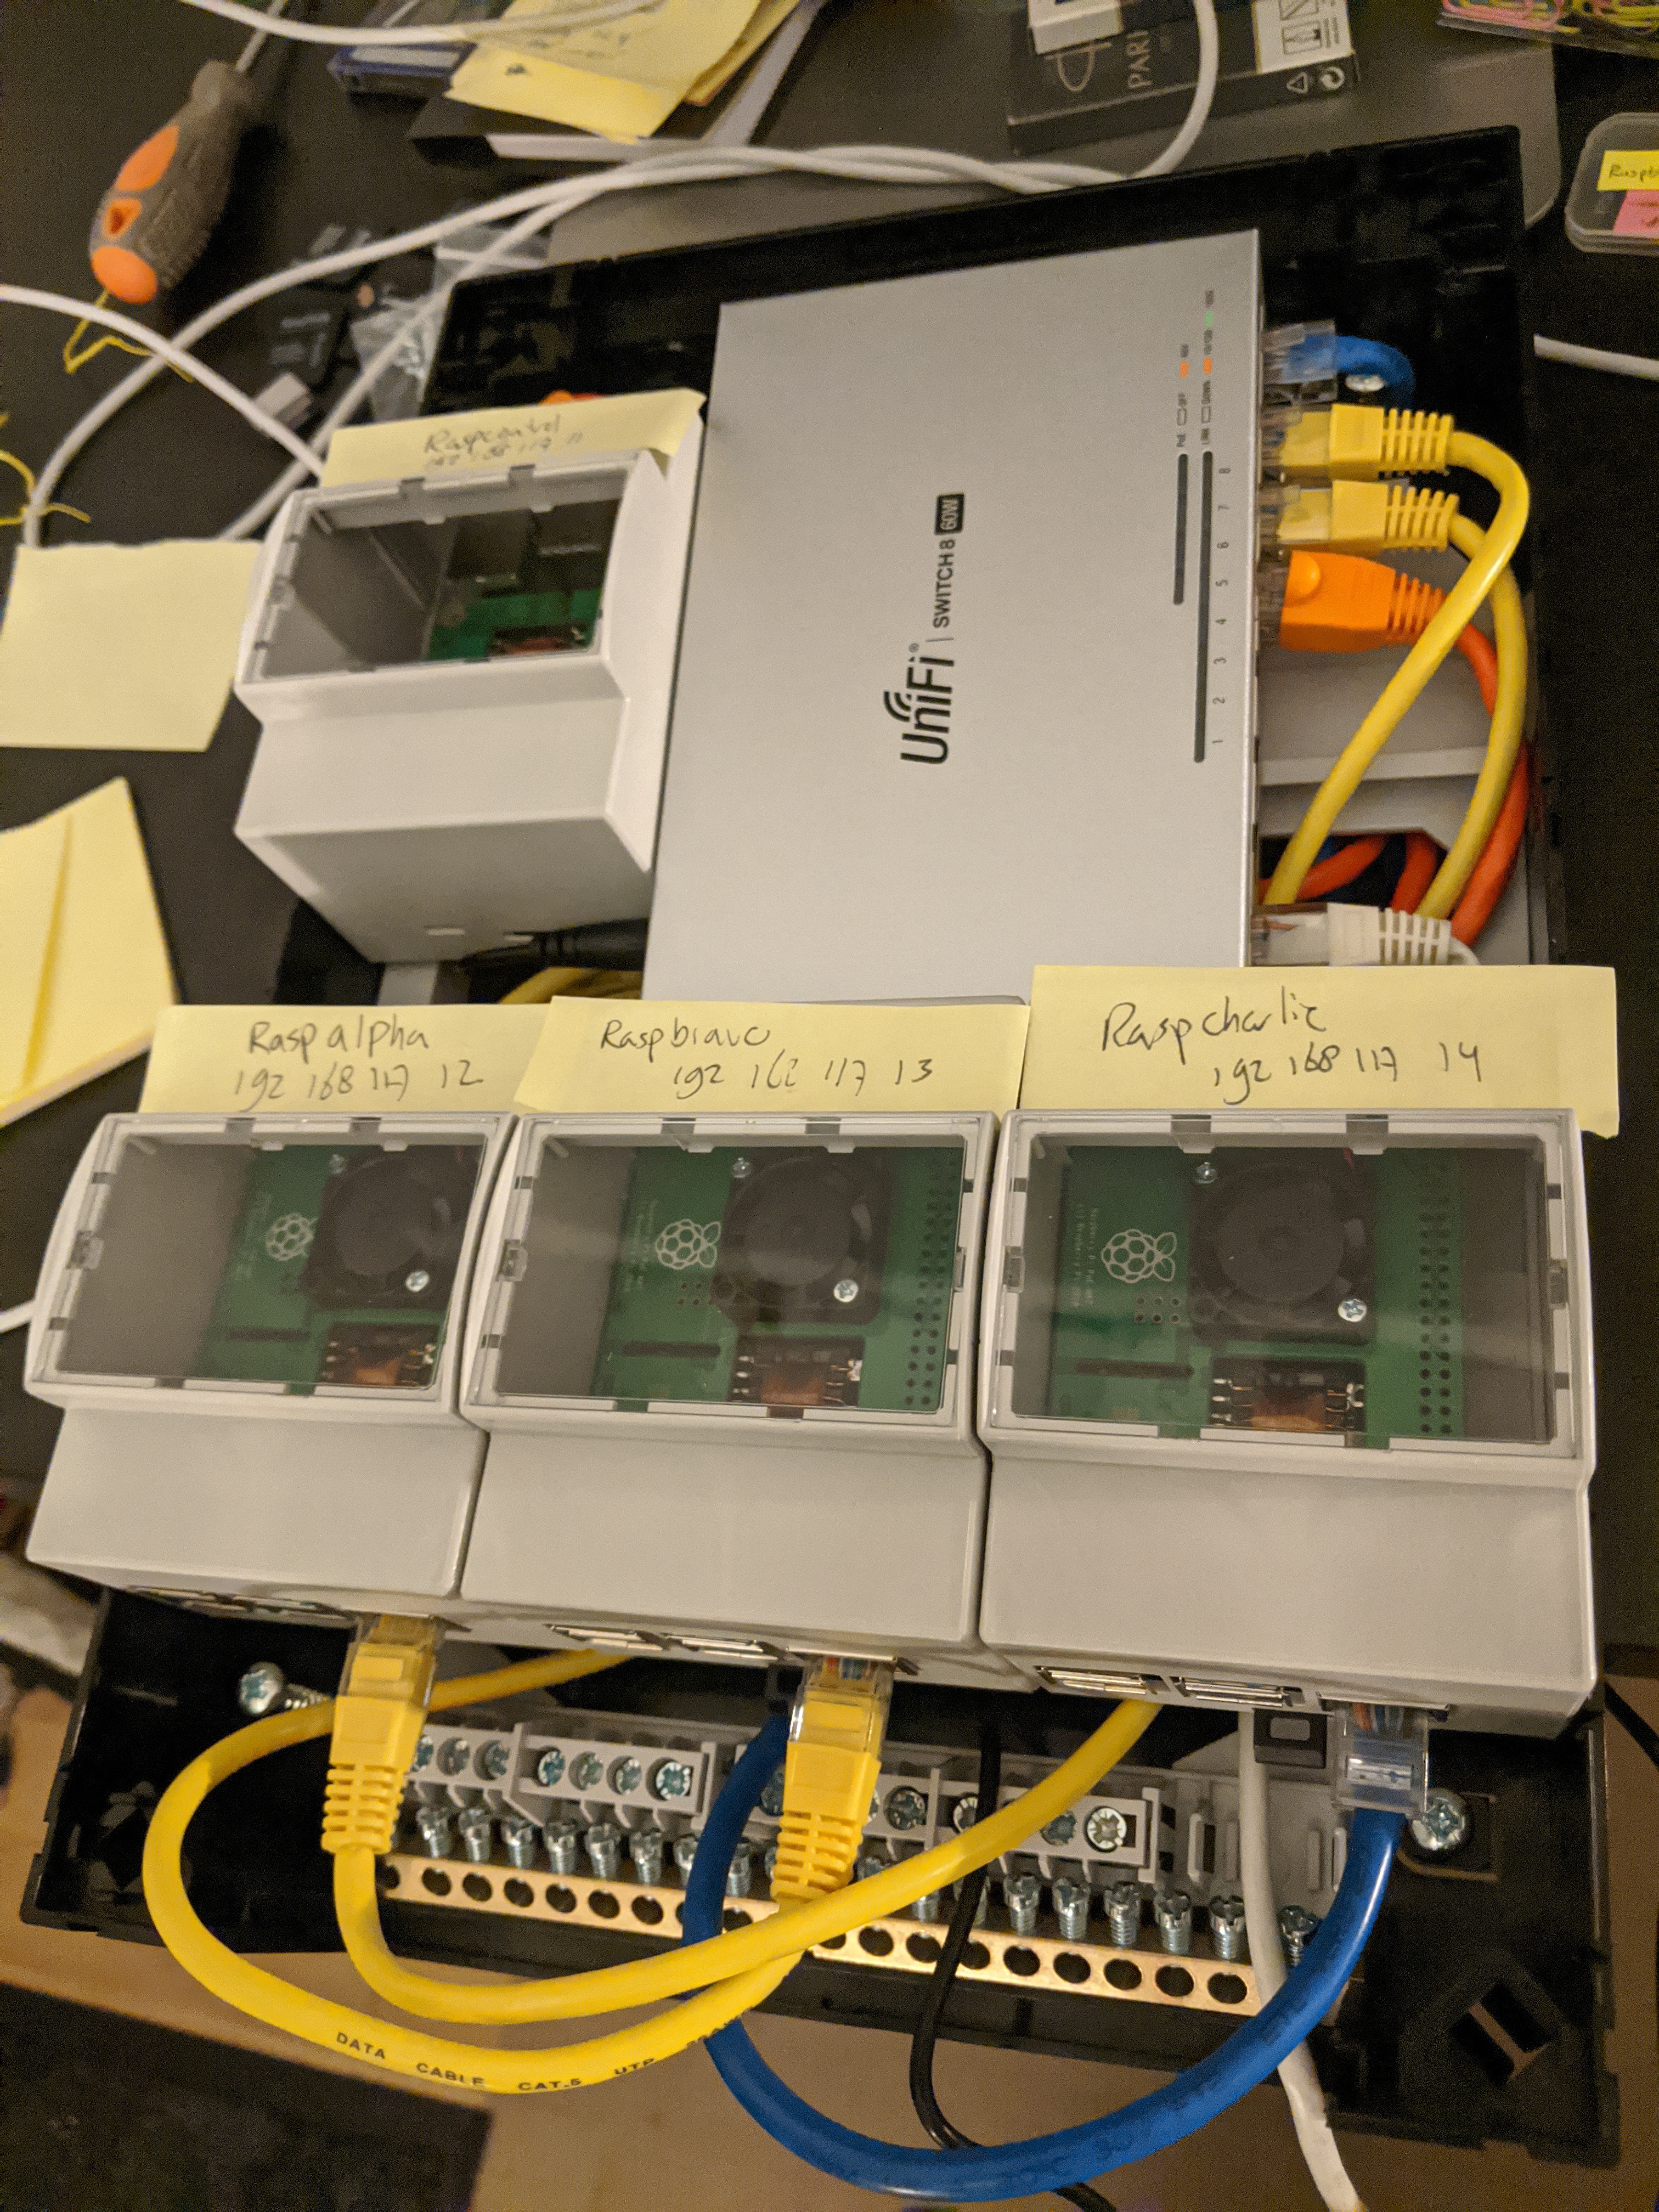
The biggest surprise came when I turned on the full rig and ran some load on the cluster. It is LOUD! Like, very, very loud! The fans do a great job at cooling the processors but with 4 fans running simultaneously it is quite a grating sound, and not something you want to have close to people living. Good thing it is tucked away somewhere far!
I will continue with a small series of blogs on the software of the cluster project, for now I'll conclude this part with the steps needed to get the cluster running if you want to reproduce the build.
Installing the kubernetes cluster software
- Burn a fresh 64 bit server ubuntu image onto an sd card, take care to enter the right disk info to the dd part of the command
sudo sh -c 'gunzip -c ~/Downloads/ubuntu-20.04-preinstalled-server-arm64+raspi.img.xz | sudo dd of=/dev/diskX bs=32m'
- Set static ip address (edit 2024: from ubuntu 22 on, it is advised to configure this in your router)
peter@raspberrypi:~ $ cat /etc/network/interfaces
# interfaces(5) file used by ifup(8) and ifdown(8)
# Include files from /etc/network/interfaces.d:
source /etc/network/interfaces.d/*

auto eth0
iface eth0 inet static
    address 192.168.1.5
    netmask 255.255.255.0
    network 192.168.1.0
    broadcast 192.168.1.255
    gateway 192.168.1.1
    dns-nameservers 192.168.117.1 8.8.8.8
- Retrieve, update and patch operating system
sudo apt update
sudo apt upgrade
- Kubernetes requires specific cgroup memory flag in raspberry pi firmware settings, add following parameters to
/boot/firmware/cmdline.txt
cgroup_enable=cpuset cgroup_memory=1 cgroup_enable=memory
- (optional) When using PoE hat: enable variable poehat fan speed by adding these values to
/boot/firmware/usercfg.txt(2024 update: i took the poe hats off because they were just too loud)
dtparam=rpi-poe,poe_fan_temp0=10000,poe_fan_temp0_hyst=1000
dtparam=rpi-poe,poe_fan_temp1=55000,poe_fan_temp1_hyst=5000
dtparam=rpi-poe,poe_fan_temp2=60000,poe_fan_temp1_hyst=5000
dtparam=rpi-poe,poe_fan_temp3=65000,poe_fan_temp1_hyst=5000
dtparam=rpi-poe,poe_fan_temp4=70000,poe_fan_temp1_hyst=5000
6a. On controller node: Install k3s and retrieve token on controller
curl -sfL https://get.k3s.io | sh -s - --write-kubeconfig-mode 644
sudo cat /var/lib/rancher/k3s/server/node-token .
6b. On worker node: Set k3s environment variables and install k3s using controller token
k3s_server="https://192.168.1.xx:6443"
k3s_token=xxxxx
curl -sfL https://get.k3s.io | K3S_URL=$k3s_server K3S_TOKEN=$k3s_token sh -
- Assign worker role label to the worker nodes
kubectl label node raspalpha node-role.kubernetes.io/worker=worker
- Running the first Kubernetes commands on the controller node:
kubectl get nodes
kubectl get pods
kubectl get services
kubectl apply -f deployment-file.yaml
kubectl rollout status namespace/deploymentname
kubectl delete deploy/deploymentname
kubectl delete service/servicename
In the next blog, I'll talk about visualising the raspberry pi kubernetes cluster using the web ui
Check the other blogs in this raspberry pi kubernetes cluster series here:
- Kubernetes cluster build with Raspberry Pi nodes and PoE Hats in a DIN breaker box panel
- Visualising a Raspberry Pi Kubernetes cluster by deploying the k8s web interface
- Longhorn for persistant, replicated storage on raspberry pi kubernetes cluster
- Deploying monitoring TIG stack (Telegraf, InfluxDB and Grafana) on Raspberry Pi Kubernetes cluster
- Deploying a NodeJS Postgres application to a Kubernetes Raspberry Pi Cluster
- Manage SSL certificates and ingress for services in k3s kubernetes cluster using cert-manager, letsencrypt and traefik