- Published on
Wireless outside weather station using particle photon, arduino and nodejs
- Authors

- Name
- Peter Peerdeman
- @peterpeerdeman
The particle photon is a pretty awesome little arduino device with onboard wifi. When I got my set Photons I decided to extend my Raspberry Pi Arduino Weather station with some outside temperature readings using the sensor that was packaged with the Particle maker kit I got. I wanted to mount the sensor out the window of my shed and have the sensor connect to the wifi to transmit its data.
Setting up the Particle was done through the app on the phone, there is good getting started documentation on that available. Through the build.particle.io web interface I loaded the following arduino/particle snippet that exposes the current outside temperature on a double variable temperature that will be retrievable through the Particle API later. The temperature value is read using the OneWire spark library that works pretty well with the "sealed, water proof version of the DS18B20" from the maker kit.
// Use this include for the Web IDE:
#include "OneWire.h"

// Use this include for Particle Dev where everything is in one directory.
// #include "OneWire.h"

// This library can be tested on the Core/Photon by running the below
// DS18x20 example from PJRC:

// OneWire DS18S20, DS18B20, DS1822 Temperature Example
//
// http://www.pjrc.com/teensy/td_libs_OneWire.html
//
// The DallasTemperature library can do all this work for you!
// http://milesburton.com/Dallas_Temperature_Control_Library

OneWire ds(D0); // on pin D0 (a 4.7K resistor is necessary)

double temperature = 0.0;

void setup(void) {
Serial.begin(57600);
Spark.variable("temperature", &temperature, DOUBLE);
}

void loop(void) {
byte i;
byte present = 0;
byte type_s;
byte data[12];
byte addr[8];
float celsius, fahrenheit;

if ( !ds.search(addr)) {
Serial.println("No more addresses.");
Serial.println();
ds.reset_search();
delay(250);
return;
}

Serial.print("ROM =");
for( i = 0; i < 8; i++) {
Serial.write(' ');
Serial.print(addr[i], HEX);
}

if (OneWire::crc8(addr, 7) != addr[7]) {
Serial.println("CRC is not valid!");
return;
}
Serial.println();

// the first ROM byte indicates which chip
switch (addr[0]) {
case 0x10:
Serial.println(" Chip = DS18S20"); // or old DS1820
type_s = 1;
break;
case 0x28:
Serial.println(" Chip = DS18B20");
type_s = 0;
break;
case 0x22:
Serial.println(" Chip = DS1822");
type_s = 0;
break;
default:
Serial.println("Device is not a DS18x20 family device.");
return;
}

ds.reset();
ds.select(addr);
ds.write(0x44, 1); // start conversion, with parasite power on at the end

delay(1000); // maybe 750ms is enough, maybe not
// we might do a ds.depower() here, but the reset will take care of it.

present = ds.reset();
ds.select(addr);
ds.write(0xBE); // Read Scratchpad

Serial.print(" Data = ");
Serial.print(present, HEX);
Serial.print(" ");
for ( i = 0; i < 9; i++) { // we need 9 bytes
data[i] = ds.read();
Serial.print(data[i], HEX);
Serial.print(" ");
}
Serial.print(" CRC=");
Serial.print(OneWire::crc8(data, 8), HEX);
Serial.println();

// Convert the data to actual temperature
// because the result is a 16 bit signed integer, it should
// be stored to an "int16_t" type, which is always 16 bits
// even when compiled on a 32 bit processor.
int16_t raw = (data[1] << 8) | data[0];
if (type_s) {
raw = raw << 3; // 9 bit resolution default
if (data[7] == 0x10) {
// "count remain" gives full 12 bit resolution
raw = (raw & 0xFFF0) + 12 - data[6];
}
} else {
byte cfg = (data[4] & 0x60);
// at lower res, the low bits are undefined, so let's zero them
if (cfg == 0x00) raw = raw & ~7; // 9 bit resolution, 93.75 ms
else if (cfg == 0x20) raw = raw & ~3; // 10 bit res, 187.5 ms
else if (cfg == 0x40) raw = raw & ~1; // 11 bit res, 375 ms
//// default is 12 bit resolution, 750 ms conversion time
}
celsius = (float)raw / 16.0;
fahrenheit = celsius \* 1.8 + 32.0;

temperature = celsius;

Serial.print(" Temperature = ");
Serial.print(celsius);
Serial.print(" Celsius, ");
Serial.print(fahrenheit);
Serial.println(" Fahrenheit");
}
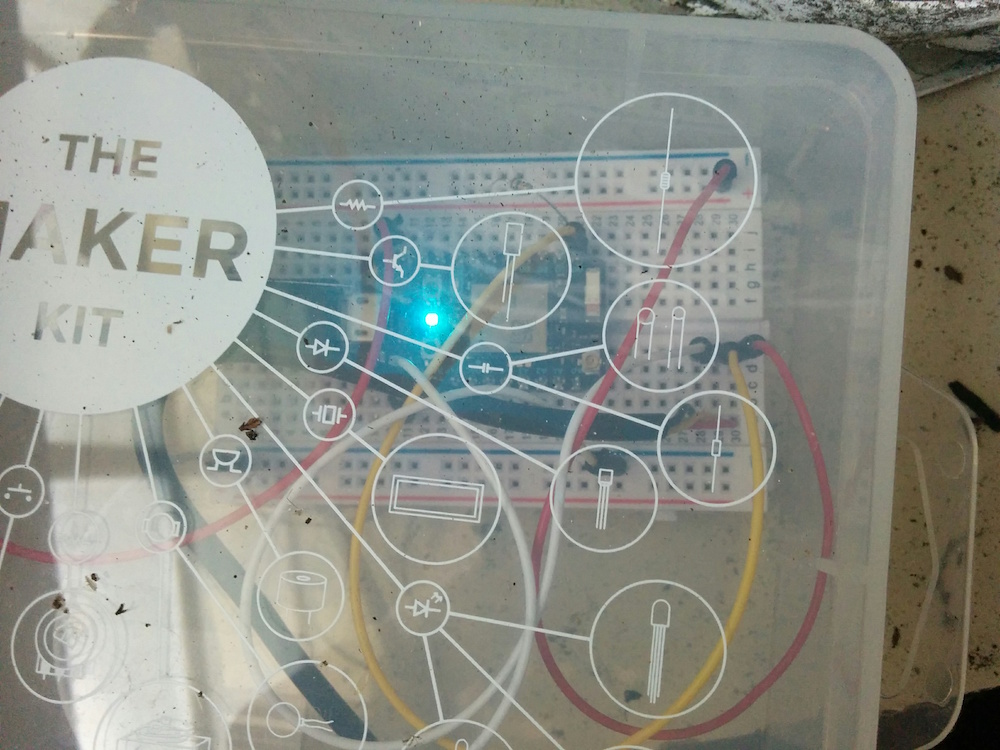
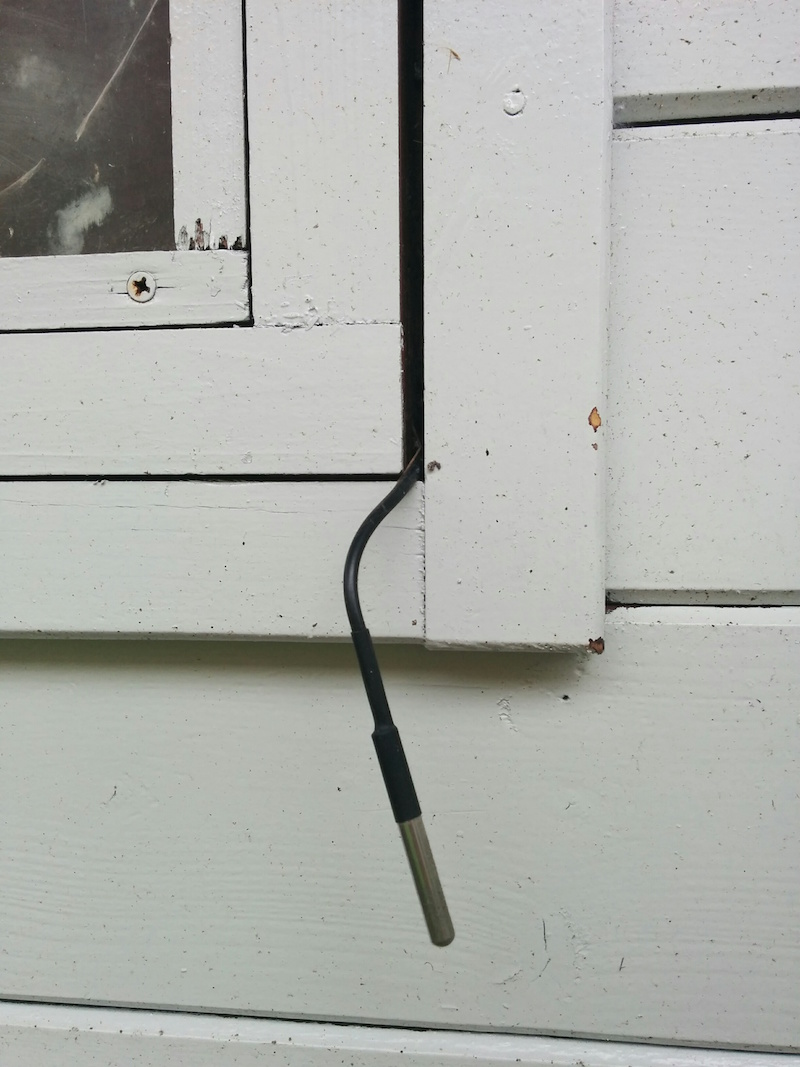
I put the photon and wiring in the plastic case, plugged in a usb charger in the shed and fed the temperature through the windows of the shed:
The particle photon is now sending it's temperature data to the particle cloud, and I can access these from my nodejs weather script on the raspberrypi using the PARTICLE_DEVICE_ID and PARTICLE_ACCESS_TOKEN from the Particle cloud api as follows:
function logOutsideTemperature() {
    var url = [
        'https://api.particle.io/v1/devices/',
        PARTICLE_DEVICE_ID,
        '/temperature?access_token=',
        PARTICLE_ACCESS_TOKEN,
    ].join('');
    request(url, function (error, response, body) {
        if (!error && response.statusCode == 200) {
            var temperatureFloat = JSON.parse(body).result;
            if (temperatureFloat == '-0.0625' || parseFloat(temperatureFloat) > 100) return;
            var logEntry = new Date().toString() + ';' + temperatureFloat + '\n';
            fs.appendFile('temperatures-outside.txt', logEntry, function (err) {
                //
            });
        }
    });
}
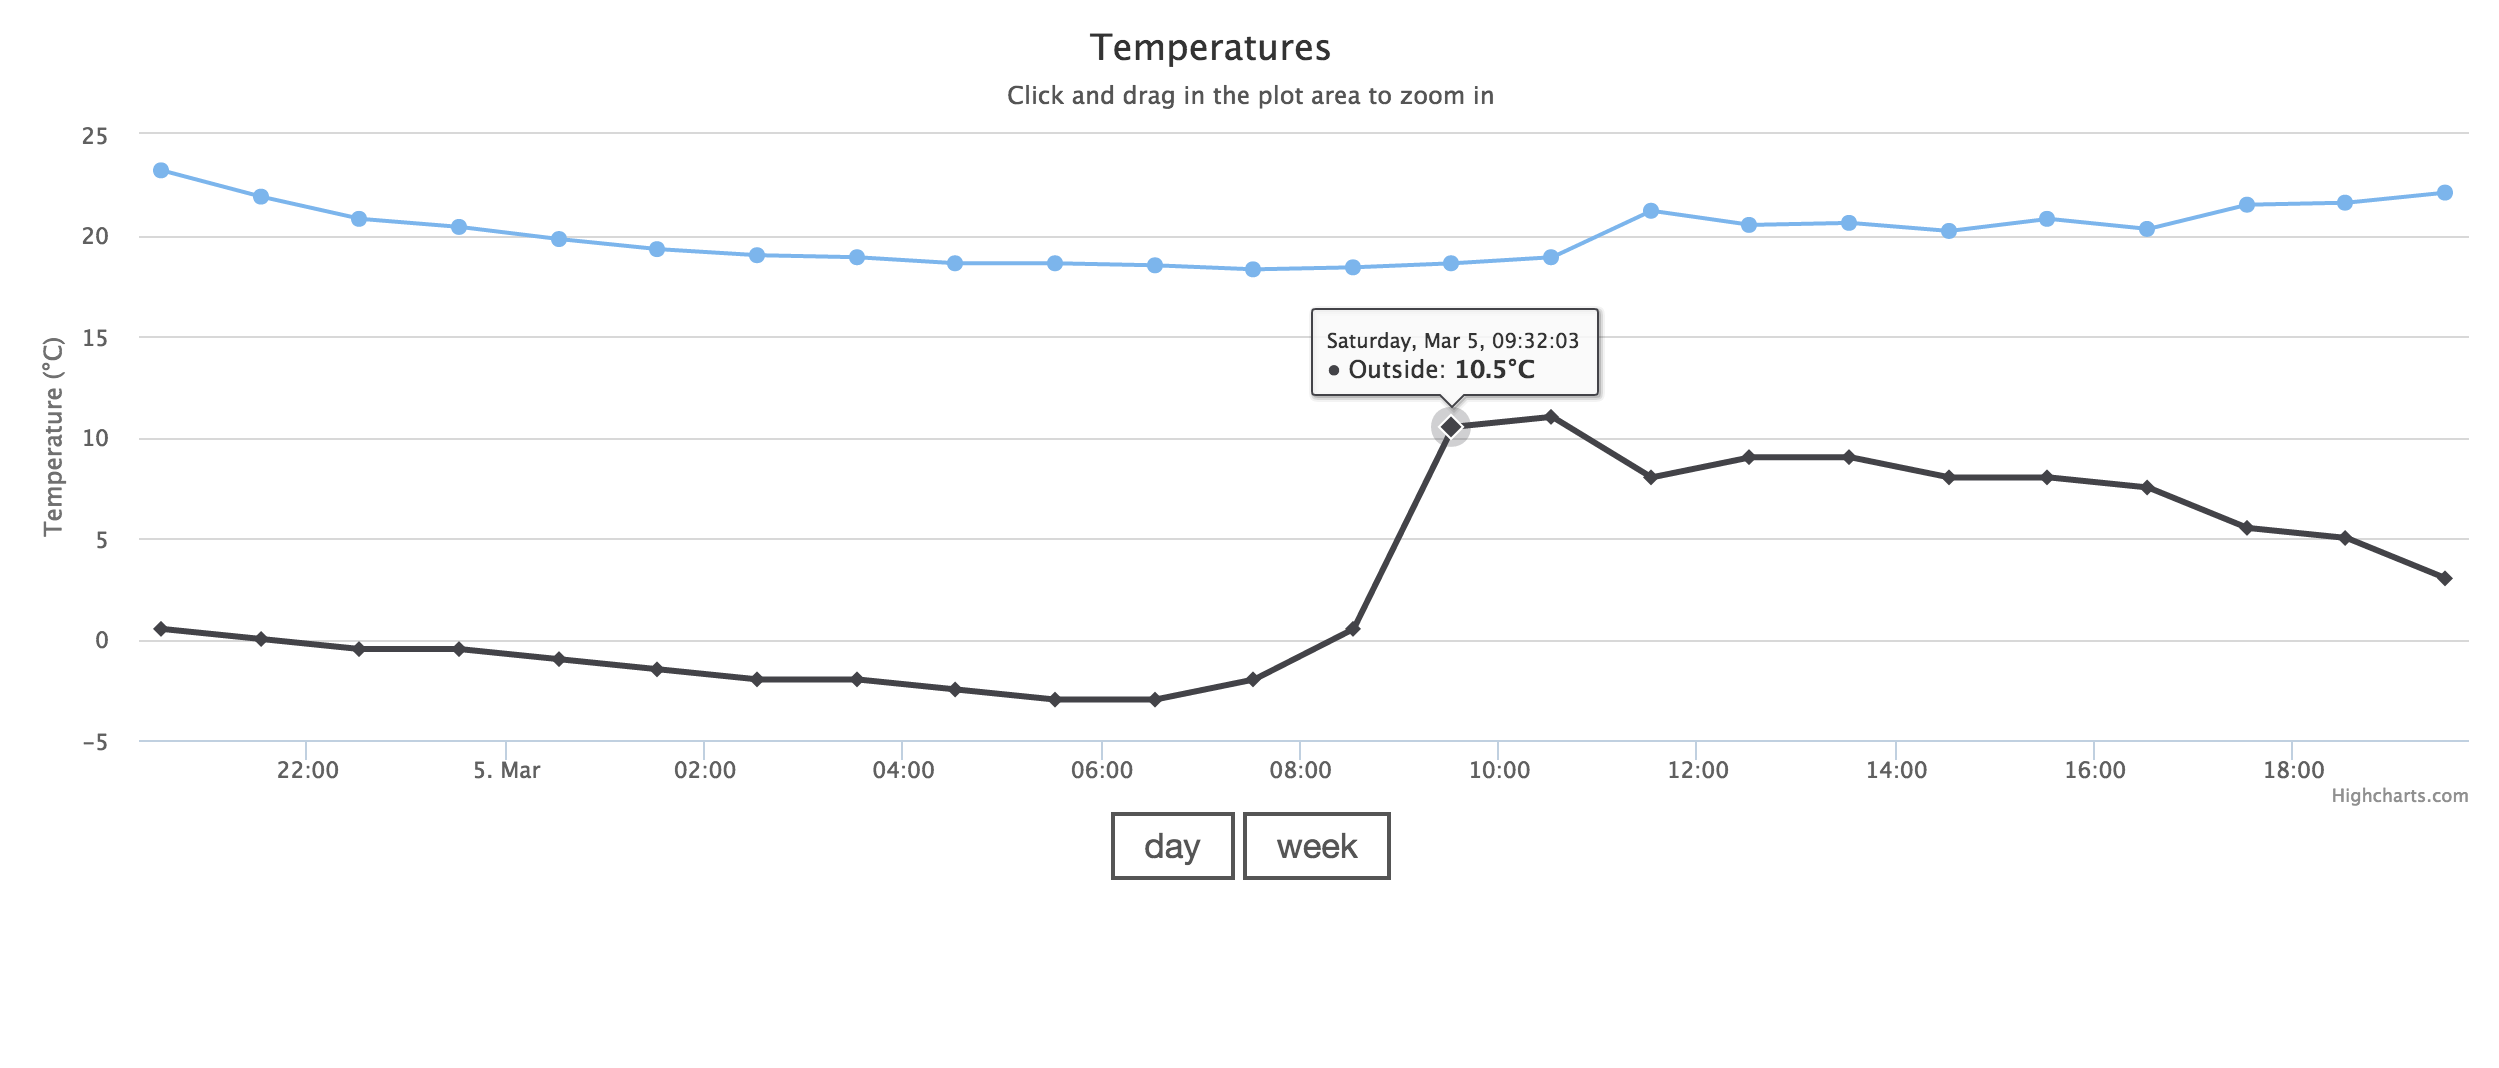
For some reason, there are sometimes some strange celsius values popping up, which I've excluded using some simple checks. To keep the data management easy, I'm writing the temperature values to a simple text file, and retrieve the data in the webinterface the same way I did on the previous version of the raspweather node API. The weather graph now shows both outside and inside temperature: